A friend recently enquired about my alternative way of doing stem stitch. It got me thinking. There are several embroidery stitches which may be done in a couple of ways, and these alternatives may be useful in different circumstances. It mainly boils down to forwards or backwards!
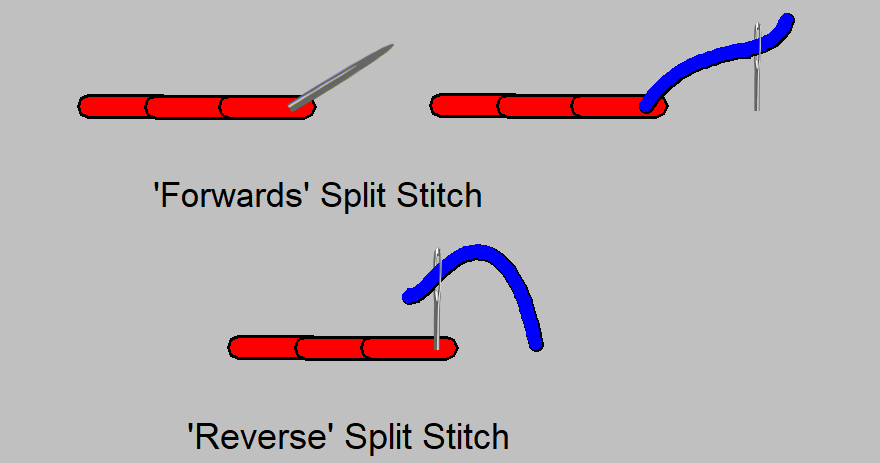
Identifying the differences really started when I was doing miniature work. Split Stitch is useful in miniatures, as done with short stitches it looks like a tiny chain stitch. BUT… stitching the usual way, ie coming up through the previous stitch, can be frustrating, as you often end up coming back up through the same hole, and losing the stitch. So I developed the habit of stitching it ‘back-stitch fashion’, coming up further along the line and down into the stitch. That works better in miniature, but does leave a lot of thread on the back. However, this is only a real problem if you are doing a LOT of close-packed split stitch, for example doing Opus Anglicanum work.
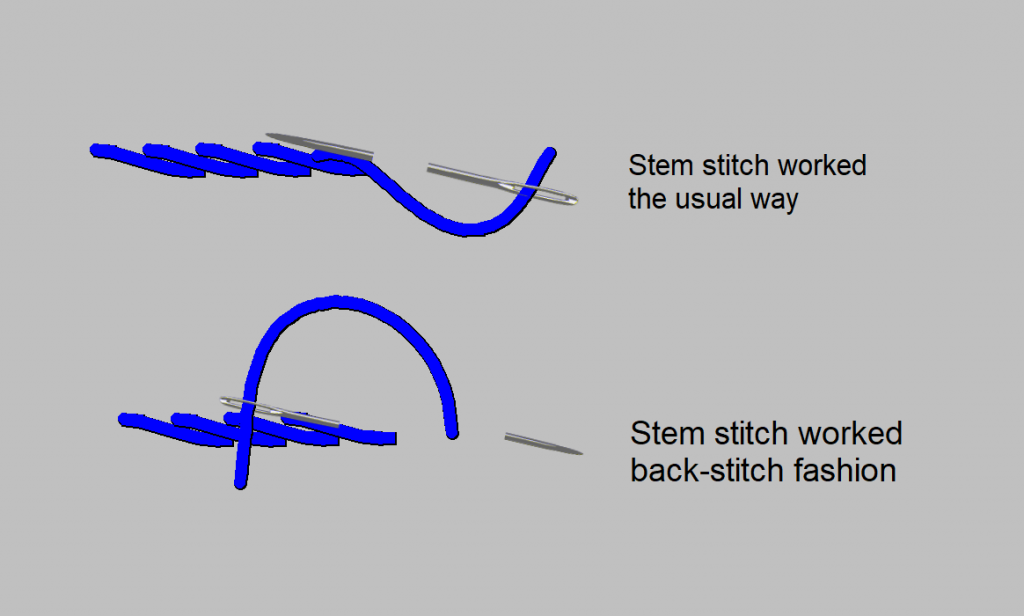
Having developed this way of working split stitch, I started to apply this to stem stitch as well, especially in miniatures, for the same reason. Then as I was teaching workshops, I found that some of my students found it easier to work stem stitch that way, at least when they were starting out. It’s easier to keep the ‘twist’ effect of the stem stitch even. The same problem of lots of thread on the back applies, but it can be a useful alternative, if you are finding stem stitch (or outline stitch for that matter!) hard to get to grips with.
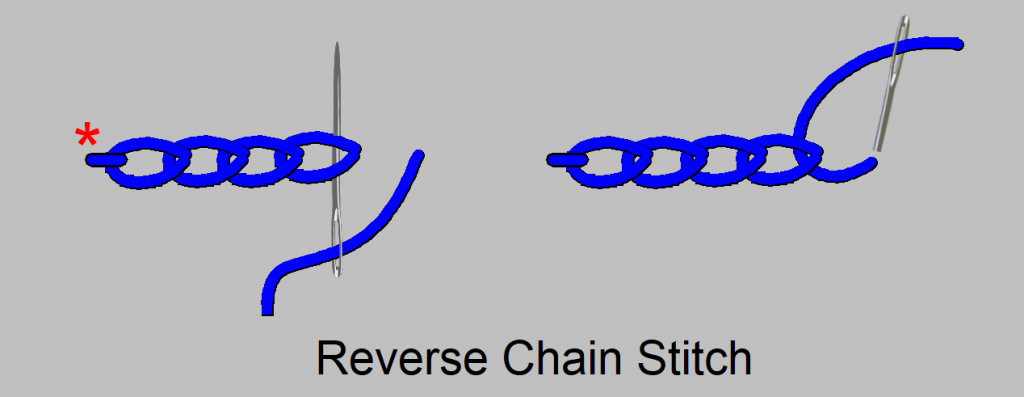
The other stitch I have found which works well in reverse is chain stitch. ‘Normal’ chain stitch works well, but I do find it frustrating sometimes if I’m working with more than 1 strand of embroidery thread. Sometimes the separate strands don’t pull through equally, and the loops of stitch can look untidy. (Sorry, I should confess I am something of a nerd – as if you haven’t figured that out already!) However, there is a version of chain stitch which is used with metallic threads – called, logically for once, Reverse Chain Stitch. It is useful with metallics as the thread doesn’t go through the fabric repeatedly, so it is less likely to strip the outer metallic covering off. Having taught this at a workshop – with metallics – I have a couple of students who now use that version of chain stitch habitually, as they find it easier to keep the stitching even.
So, I offer these as alternative ways of working some common stitches. For the anoraks amongst us, yes, they do look slightly different on the front, and very different on the back, but most folks would not notice any difference. If they make learning to use these stitches easier, where’s the harm?
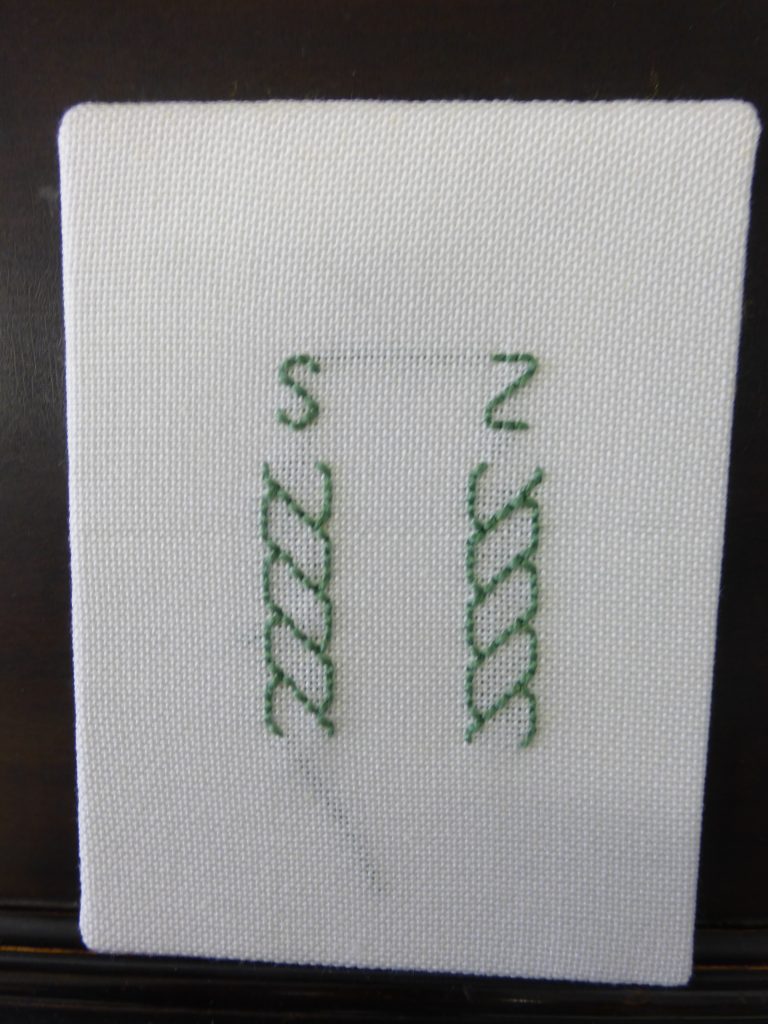
Incidentally, you can also regard Stem Stitch and Outline Stitch as 2 alternatives of the same stitch. They are basically identical, except that for Stem Stitch you lay the loop downwards, working right to left, as in the diagram below. For outline stitch, you would lay the loop upwards instead. The effect of this is that Stem stitch produces a ‘Z-twisted’ line, with the apparent twist working top-right to bottom left, like in a Z, whereas Outline stitch is ‘S-twisted’ (top left to bottom right).
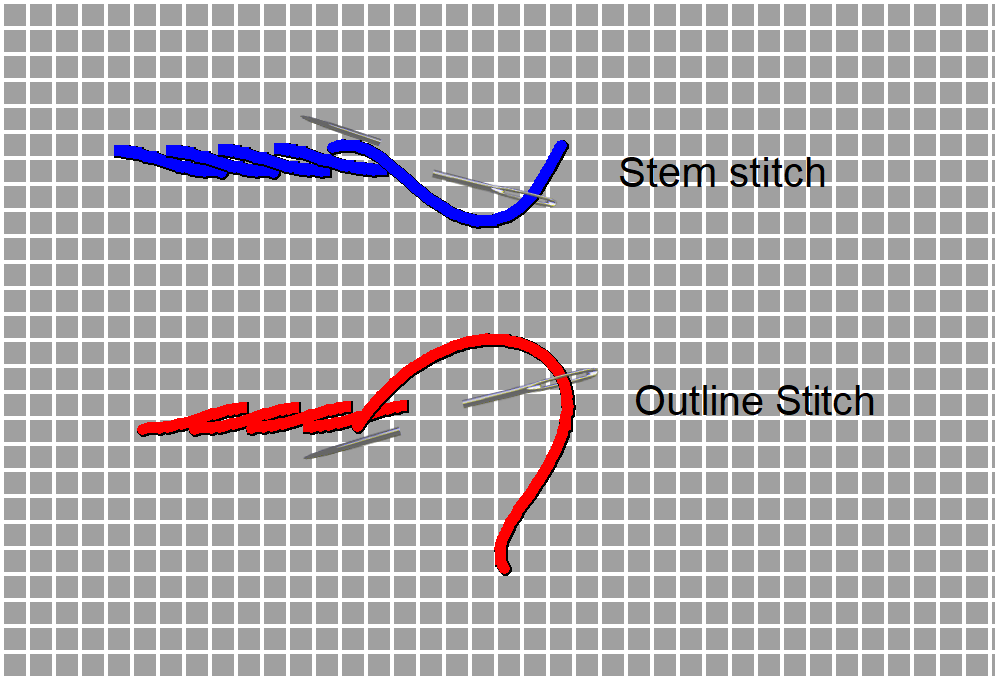
Most of the time this doesn’t really matter, but for the anoraks amongst you, the effect can be slightly different with different threads: the important aspect is the twist of the thread itself. The stitch will be more defined if the ‘twist‘ of the stitch is OPPOSITE to that of the thread. So if your thread is S-twist, such as most stranded cottons, you will get a better effect with Z-twist stitching, ie Stem Stitch. If you are using a Z-twist thread, such as the Silk Mill Silks that are my FAVOURITE threads, you are better with Outline Stitch. Try them both sometime and see what you think.
Anoraks of the world, UNITE! We have nothing to lose but our sanity…….
(Charting Software Stitchgraph, by www.ursasoftware.com)